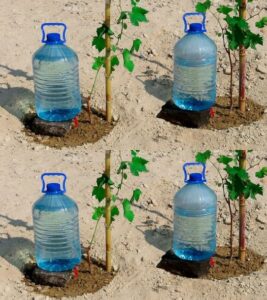
How to Create Your Own Drip Sprinkler System: A Guide to Efficient Watering
As spring approaches, maintaining a healthy garden and vegetable plot becomes a priority. One key aspect of gardening is ensuring that your plants receive the right amount of water. If you’re looking for an efficient and effective watering solution, creating your own drip sprinkler system might be the answer. In this guide, we’ll walk you through the benefits of a drip sprinkler system and how to set one up yourself.
What is a Drip Sprinkler System?
A drip sprinkler system is an irrigation method designed to deliver water directly to the roots of plants. This system uses a network of flexible pipes and drippers to provide a steady, controlled flow of water. Unlike traditional sprinklers that spray water over a wide area, a drip sprinkler system targets the root zone of each plant, ensuring that water is used efficiently.
Benefits of a Drip Sprinkler System
- Efficient Water Use: Drip sprinklers deliver water directly to the roots, minimizing evaporation and runoff. This targeted approach ensures that each plant receives the exact amount of water it needs, reducing water waste and conserving resources.
- Reduced Risk of Plant Diseases: By keeping the leaves and flowers dry, a drip sprinkler system helps prevent diseases that thrive in wet conditions. This method also reduces the risk of waterlogging, which can lead to root rot and other issues.
- Customizable Water Flow: With a drip sprinkler system, you can easily adjust the water flow to meet the specific needs of different plants. This flexibility allows you to accommodate varying water requirements based on plant type and weather conditions.
- Saves Time and Effort: Once set up, a drip sprinkler system requires minimal maintenance. This automation means you can spend less time manually watering your garden and more time enjoying it.
How to Set Up Your Own Drip Sprinkler System
Creating a drip sprinkler system is a straightforward process that can be accomplished with a few basic materials. Follow these steps to set up your own system:
Materials Needed:
- Drip irrigation tubing
- Drippers or emitters
- Hose connectors and stakes
- Filter and pressure regulator
- Scissors or tubing cutter
Steps to Create a Drip Sprinkler System:
- Plan Your Layout: Start by planning the layout of your drip sprinkler system. Decide where you want to place the tubing and how many drippers you need for each plant or row.
- Install the Filter and Pressure Regulator: Attach a filter and pressure regulator to your water source. This step ensures that your system operates efficiently and prevents clogging of the drippers.
- Cut and Lay Out Tubing: Measure and cut the drip irrigation tubing to fit your garden layout. Lay the tubing along the rows of plants or around individual plants, securing it in place with stakes.
- Attach Drippers: Install drippers or emitters along the tubing at the appropriate intervals. These devices will deliver the water directly to the roots of your plants. Make sure to adjust the flow rate according to the needs of your plants.
- Connect and Test: Connect the tubing to the water source and turn on the system. Check for leaks and ensure that the water is reaching all the plants as planned. Adjust the flow rates and positioning of the drippers if needed.
- Monitor and Adjust: Regularly monitor your drip sprinkler system to ensure it’s functioning properly. Adjust the water flow and positioning as your plants grow and their needs change.
Conclusion
A drip sprinkler system is a fantastic way to keep your garden healthy and vibrant while conserving water. By following these simple steps, you can create an efficient irrigation system that saves time and resources. Enjoy a lush, well-watered garden this spring with your own DIY drip sprinkler system!


